

Advice
Choosing fireplace chambers and hearths
Plan the opening, chamber lining, hearth material and proportions around the fire or stove, with the technical specification checked for the exact appliance.
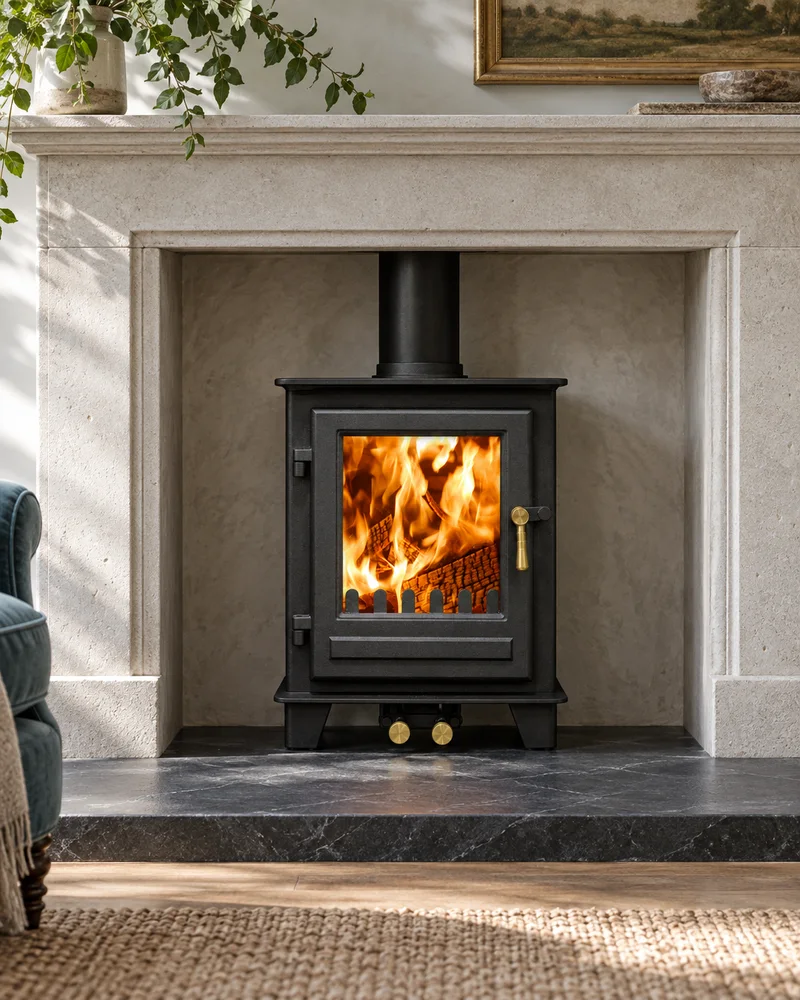
A fireplace chamber and hearth do more than frame an appliance. They set its scale in the room, create the surface around it and, for a combustion appliance, form part of the installation that protects the building. A good choice therefore begins with the fire or stove, the opening and the property rather than with a finish seen in isolation.
The design can still be expressive. Brick, slate, stone, tile and smooth board finishes each change the character of the fireplace. The important point is to separate visual preference from the technical specification, then bring the two together before materials are ordered.
Start with the exact appliance
The same fireplace opening can behave very differently with a freestanding wood stove, an inset gas fire or an electric appliance. Record the complete model and obtain its current installation instructions before finalising the chamber or hearth.
Useful appliance details include:
- overall body, door and handle dimensions;
- heat output and fuel type;
- flue outlet position where one applies;
- required distances to combustible and non-combustible materials;
- ventilation and air-circulation requirements;
- hearth specification and maximum hearth-temperature declaration;
- access needed for controls, cleaning and maintenance.
Do not assume that a chamber built for one stove will suit its replacement. Even models with a similar nominal output can have different body dimensions, side clearances, flue positions and hearth requirements.
What the chamber changes
The chamber is the visible interior of the fireplace opening. Its width, height, depth and finish affect how strongly the appliance reads in the room. A tight opening can make a stove look crowded and may conflict with its installation instructions. A very large opening can make a modest appliance look lost.
Consider the chamber as a composition:
- Width around the appliance. Leave enough visual breathing room while following the model-specific requirements.
- Height above it. The lintel, register arrangement and flue connection need to be resolved before choosing a decorative proportion.
- Depth. Confirm that the appliance, connection and required access fit without pushing the hearth projection or surround out of balance.
- Sight lines. View the proposed opening from the main seating position, doorway and adjacent spaces.
- Finish. Decide whether the chamber should recede quietly or add texture and contrast.
A measured sketch or taped outline helps. The photo survey is a useful way to share the existing opening and room before a showroom discussion.
Chamber finish choices
Brick slips can give a traditional or industrial appearance without visually dominating a smaller room when the colour and joint are restrained. Slate or stone panels create a calmer, more continuous background. Tile can introduce pattern or colour, while purpose-made non-combustible boards can support a clean, simple finish when specified for the application.
Check more than the face material. The substrate, adhesive, joints, edges and any finish applied to them must be suitable for the temperatures and installation. A product being described as stone, tile or fire resistant does not by itself confirm that the complete build-up suits the chosen appliance.
Texture also affects upkeep. Deep joints and rough surfaces tend to hold more dust. Pale porous stone may show marks differently from dark slate or brick. Ask how the material should be cleaned and whether natural variation is part of its appearance.
What the hearth needs to do
For solid-fuel and other combustion appliances, the hearth helps protect the building and marks the area that should remain clear. Approved Document J provides guidance for hearths, fireplaces, flues and chimneys in England, including different arrangements according to the appliance and the temperature it can cause beneath it.
That is why one universal thickness or projection should not be copied from another installation. The right construction depends on the appliance declaration, its position, the floor and the applicable guidance. The installer should work from the exact manual and the property, then record the agreed specification.
An electric fire may not need a combustion hearth, but a plinth or decorative hearth can still improve proportion, protect flooring and make the fireplace feel intentional. It must not obstruct the appliance ventilation, heater outlet or service access.
Choosing a hearth material
Common visible hearth materials include slate, granite, limestone, marble, brick, tile and glass. Classic Mantels notes that it supplies hearths in slate, granite, limestone and marble, while its hearth guidance also describes brick, tile and toughened glass as possible design directions.
Compare them through four questions:
| Question | Why it matters |
|---|---|
| Is it suitable for this appliance and hearth construction? | Appearance cannot replace the technical specification. |
| How will its colour and pattern relate to the chamber and floor? | The hearth is a strong horizontal line in the room. |
| How will it age and be cleaned? | Porosity, joints, finish and natural variation affect daily care. |
| Can it be made to the required size and detail? | Slab joints, corners, curves and edge profiles influence the final look. |
Natural stone can vary between samples and finished pieces. Ask to see a representative sample, but expect differences in tone, grain, veining, fossil marks or surface character. Those differences are part of the material rather than a printed repeat.
Coordinate the surround before ordering
The chamber, hearth and mantel should be drawn together. Check the opening size, overall mantel width and height, shelf projection, hearth width and depth, skirting junctions and the position of nearby sockets or switches. If the floor will change, establish the final floor level too.
A made-to-order surround may allow dimensions, material and rebate depth to be adjusted. The rebate is especially important because it helps determine how the surround meets the chamber, slips or fire. Confirm it from the complete fireplace build-up rather than selecting it independently.
The fireplace surrounds and mantels page covers the wider frame, while the separate mantel material guide compares limestone, marble and timber.
A practical decision sequence
- Identify the exact appliance and obtain its current manual.
- Measure and assess the existing opening, chimney breast, floor and room.
- Confirm the technical chamber and hearth construction.
- Test the appliance and opening proportions on a drawing.
- Shortlist suitable chamber and hearth finishes.
- Coordinate the surround, skirting, flooring and any other trades.
- Approve samples, dimensions, joints and edge details before ordering.
- Keep installation and care information with the project records.
The installation guide explains where these choices sit in the wider project. Visit the Macclesfield showroom with room photographs and measurements to compare the scale and finish of the options in person.
Sources checked
General guidance checked on 16 September 2026 against:
- GOV.UK: Approved Document J for combustion appliances and fuel storage systems
- Classic Mantels: choosing a hearth
- Classic Mantels: natural stone, timber and hearth materials
This guide helps organise design decisions. The final chamber, hearth, substrate, clearances and installation must be specified for the exact appliance, complete fireplace construction and property.
Continue planning
Related buyer guides
Choosing limestone, marble or timber fireplace mantels
Compare the character, variation, care and practical design questions behind natural stone and timber fireplace surrounds.
02How to choose the right stove output for a room
Understand nominal stove output, room heat demand and the property details that matter before choosing a kW rating.
03Preparing for a stove and fire showroom visit
Bring the photographs, measurements and property details that turn a showroom visit into a useful shortlist for your home.
A simple first step
Ask about your room
Tell us what you have in mind. The showroom team will be in touch shortly.
Prefer to talk? Call 01625 402900.